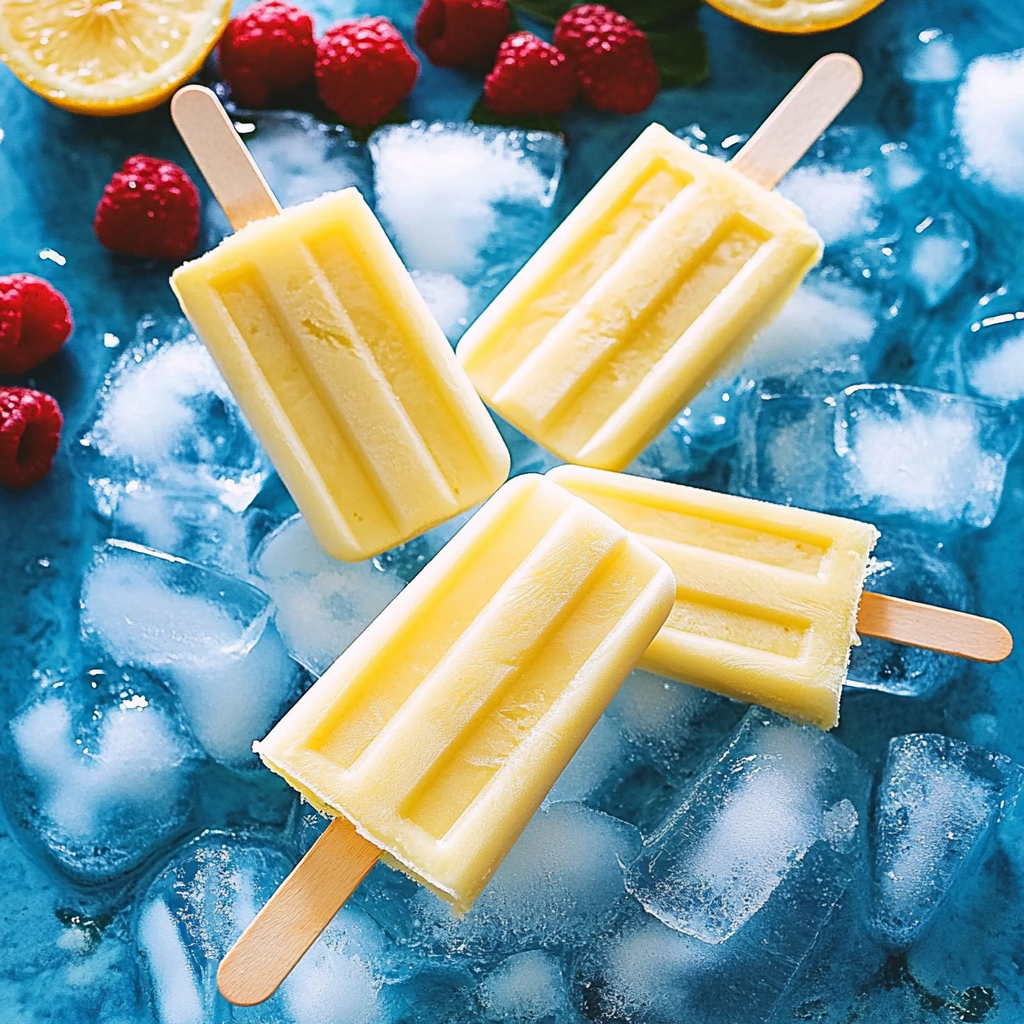
Indulging in Piña Colada Popsicles feels like a tropical vacation with every bite. Picture this: creamy coconut and sweet pineapple mingling together, promising a cool escape from the sweltering heat. The moment you pop one in your mouth, you’re whisked away to a beach chair, toes in the sand, and a cocktail in hand—minus the worry of forgetting sunscreen.
These delightful treats are not just any popsicles; they’re a playful nod to summer memories spent sipping piña coladas while pretending you’re on a never-ending holiday. Whether it’s a backyard barbecue or just lounging on your couch binge-watching your favorite series, these popsicles add that extra zing of fun to any occasion.
Why You'll Love This Recipe
- These Piña Colada Popsicles are incredibly easy to make and require no fancy equipment
- They burst with tropical flavors that will transport you straight to paradise
- Their vibrant colors make them visually appealing, perfect for impressing guests at any gathering
- You can customize them with different fruits or even add a splash of rum for an adult twist!
Ingredients for Piña Colada Popsicles
Here’s what you’ll need to make this delicious dish:
- Coconut Milk: Use full-fat coconut milk for creaminess; it gives the popsicles that rich tropical flavor.
- Pineapple Chunks: Fresh is best, but canned works too—just drain them well to avoid excess liquid.
- Honey or Maple Syrup: Sweeteners can be adjusted based on your taste; honey adds depth while maple brings an earthy note.
- Lime Juice: A splash of fresh lime juice balances the sweetness and enhances those tropical flavors.
The full ingredients list, including measurements, is provided in the recipe card directly below.

How to Make Piña Colada Popsicles
Follow these simple steps to prepare this delicious dish:
Step 1: Gather Your Ingredients
Collect all your ingredients and grab a blender. You’ll want everything ready so you don’t end up playing ingredient hide-and-seek halfway through.
Step 2: Blend Away
In your blender, combine coconut milk, pineapple chunks, honey or maple syrup, and lime juice. Blend until smooth—aim for a consistency that makes you think of silky beaches.
Step 3: Taste Test
Now’s the fun part! Give the mixture a quick taste test. If it needs more sweetness or tanginess, adjust as necessary. Remember: it’s all about your flavor preference!
Step 4: Pour Into Molds
Carefully pour the blended mixture into popsicle molds, leaving a little space at the top because they expand when freezing (just like my waistline during holidays).
Step 5: Add Sticks
Insert sticks into each mold and place them upright in the freezer. If you’re feeling adventurous, toss some more pineapple chunks into each mold for extra texture.
Step 6: Freeze and Enjoy
Freeze for at least four hours or until solid. Once frozen solid, run warm water over the outside of the molds for easy removal. You’ll be left with refreshing popsicles that taste like summer!
For serving suggestion: Present these fabulous treats on colorful plates or sticks sprinkled with shredded coconut for that extra flair—because who doesn’t love eye candy along with their edible candy?
You Must Know
- Piña Colada Popsicles are not just a fun treat; they transport you straight to a tropical paradise
- Easy to make and customizable, these popsicles will impress guests at summer gatherings
- With vibrant flavors and colors, they are the perfect way to cool down on warm days
Perfecting the Cooking Process
To make Piña Colada Popsicles, blend your pineapple, coconut milk, and sweetener first. Pour the mixture into molds and freeze for at least four hours. This sequence guarantees creamy popsicles that won’t fall apart when you take them out.
Add Your Touch
Feel free to customize your Piña Colada Popsicles! Swap out fresh pineapple for mango or add a splash of rum for an adult twist. You can even throw in some shredded coconut for extra texture and flavor.
Storing & Reheating
Store your Piña Colada Popsicles in the freezer, ensuring they are sealed tightly in an airtight container. They can last up to two months without losing their tropical charm. No reheating necessary—just enjoy them straight from the freezer!
Chef's Helpful Tips
- For a smoother texture, blend the pineapple thoroughly before mixing with coconut milk
- Avoid overfilling your molds to prevent spills while freezing
- To release pops easily, run warm water over the outside of the molds before pulling them out
Sometimes I think back to that hot summer day when I made these popsicles for my friends’ barbecue and their faces lit up—definitely a keeper recipe!
FAQs:
What are Piña Colada Popsicles?
Piña Colada Popsicles are a refreshing frozen treat inspired by the classic tropical cocktail. They combine the flavors of coconut, pineapple, and rum, blended together and frozen into popsicle form. These popsicles are perfect for hot summer days or as a fun dessert for parties. You can make them with or without alcohol to cater to all ages.
How do I make non-alcoholic Piña Colada Popsicles?
To create non-alcoholic Piña Colada Popsicles, simply omit the rum in your recipe. Instead, use coconut milk or cream and fresh pineapple juice. Blend these ingredients until smooth and then pour the mixture into popsicle molds. Freeze for several hours until solid. This version captures the essence of the tropical flavor without the alcohol.
Can I customize my Piña Colada Popsicles?
Absolutely! You can customize your Piña Colada Popsicles by adding different fruits like mango or berries for extra flavor. You can also adjust the sweetness by adding honey or agave syrup based on your taste preference. Experimenting with different ingredients allows you to create a unique frozen treat every time.
How long do Piña Colada Popsicles last in the freezer?
When properly stored in an airtight container, Piña Colada Popsicles can last for up to two months in the freezer. To maintain their best flavor and texture, it’s advisable to consume them within a month. Just remember to let them sit at room temperature for a few minutes before enjoying for easier removal from molds.
Conclusion for Piña Colada Popsicles:
Piña Colada Popsicles offer a delightful way to enjoy tropical flavors in a frozen treat format. With simple ingredients like coconut milk and fresh pineapple juice, they are easy to make at home. Customize them to suit your preferences, whether you want an alcoholic version or not. Keep these popsicles stored properly to enjoy them throughout summer days or special gatherings. Indulge in this refreshing dessert that brings a touch of paradise right to your kitchen!

Piña Colada Popsicles
- Total Time: 4 hours 10 minutes
- Yield: Makes about 6 popsicles 1x
Description
Indulge in the tropical bliss of Piña Colada Popsicles, a delightful frozen treat that brings the essence of summer to your palate. With a creamy blend of coconut and fresh pineapple, these popsicles are perfect for cooling off on hot days or adding a festive touch to any gathering. Simple to prepare and easily customizable, they cater to both kids and adults craving a taste of paradise at home.
Ingredients
- 1 cup full-fat coconut milk
- 1 cup fresh pineapple chunks (or canned, drained)
- 2 tablespoons honey or maple syrup (adjust to taste)
- 2 tablespoons fresh lime juice
Instructions
- Combine coconut milk, pineapple chunks, honey or maple syrup, and lime juice in a blender.
- Blend until smooth and creamy.
- Taste the mixture and adjust sweetness if needed.
- Pour the blended mix into popsicle molds, leaving space at the top for expansion.
- Insert sticks into each mold and freeze for at least 4 hours until solid.
- To serve, run warm water over the outside of the molds for easy removal.
- Prep Time: 10 minutes
- Cook Time: 240 minutes
- Category: Dessert
- Method: Freezing
- Cuisine: Tropical
Nutrition
- Serving Size: 1 serving
- Calories: 155
- Sugar: 12g
- Sodium: 20mg
- Fat: 8g
- Saturated Fat: 7g
- Unsaturated Fat: 1g
- Trans Fat: 0g
- Carbohydrates: 20g
- Fiber: 1g
- Protein: 2g
- Cholesterol: 0mg


